
Managing your sales opportunities in Zoho CRM is a great way to keep your sales team focusing more on selling and less on the tedious tracking and data entry. With that in mind, you can save your sales team even more time by automatically generate sales documents using WebMerge.
In this example, we’re going to show you how you can automatically generate an invoice when the stage of a potential is updated to “Closed Won”. We’re going to use the Webhooks feature of Zoho to automatically send data to WebMerge.
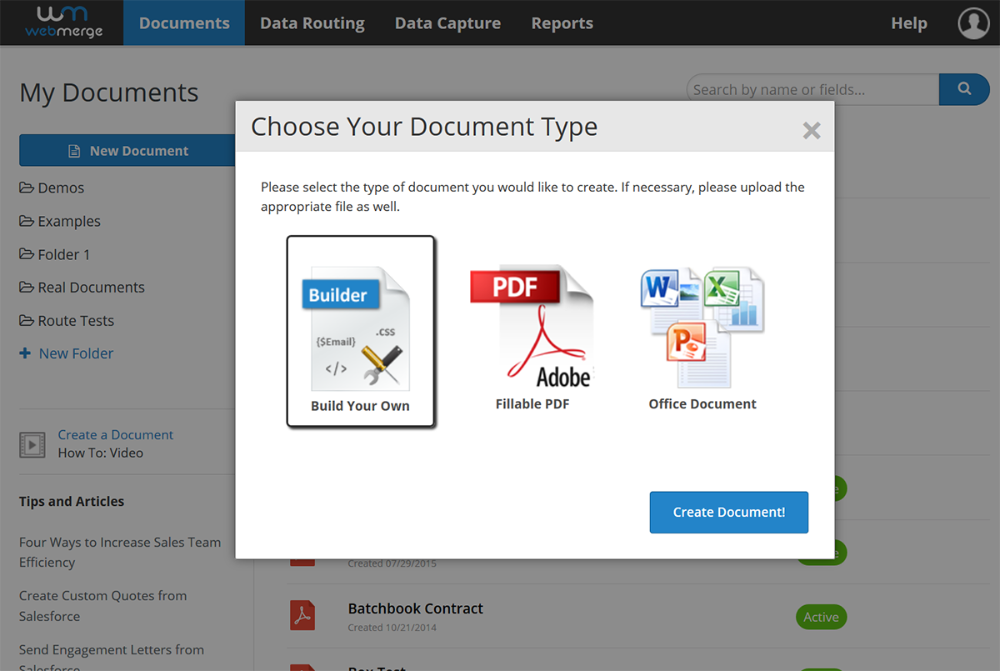
To get started, let’s setup our invoice template in WebMerge. We’re going to use the online document builder to create our template. Form the Documents page in WebMerge, click the New Document button, then type in a name. On the next step, you’ll choose the Build Your Own document type.
Once you’ve picked the document type, click Next and you’ll be taken to the Document Builder. Here’s where you can setup your template. We’re going to add a logo, business address, and then merge fields for all the data we want to pull into our invoice from Zoho.
These merge fields look like {$CustomerName}, {$Address}, {$Amount}, etc. You can use any names you’d like, but you can only use letters, numbers, and underscores in your merge fields. No special characters are allowed.
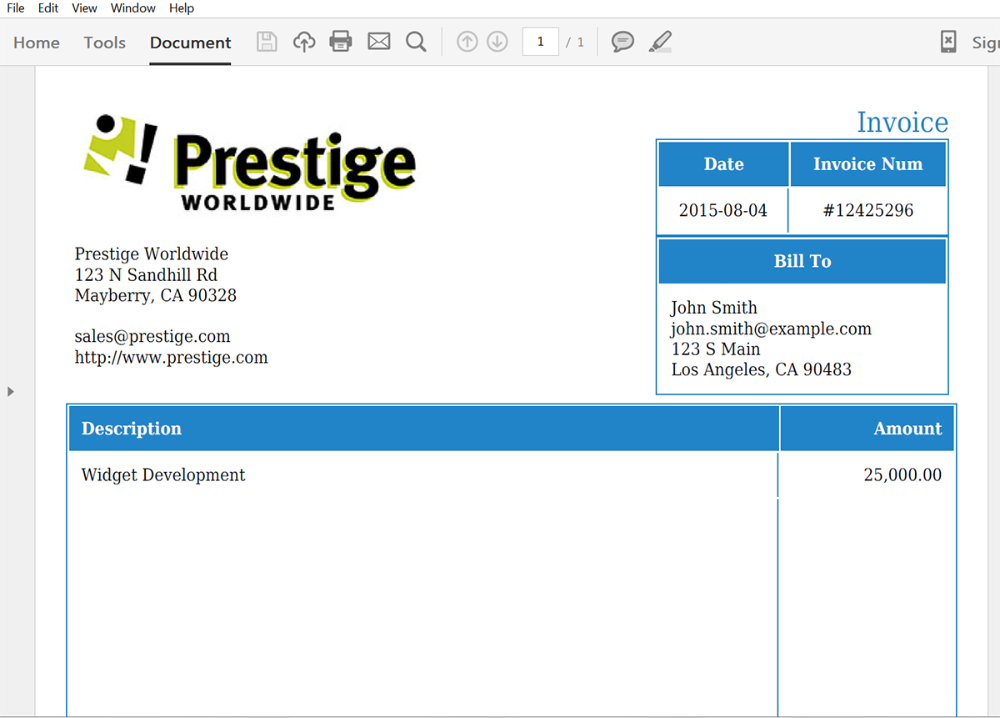
Here’s what our invoice template looks like:

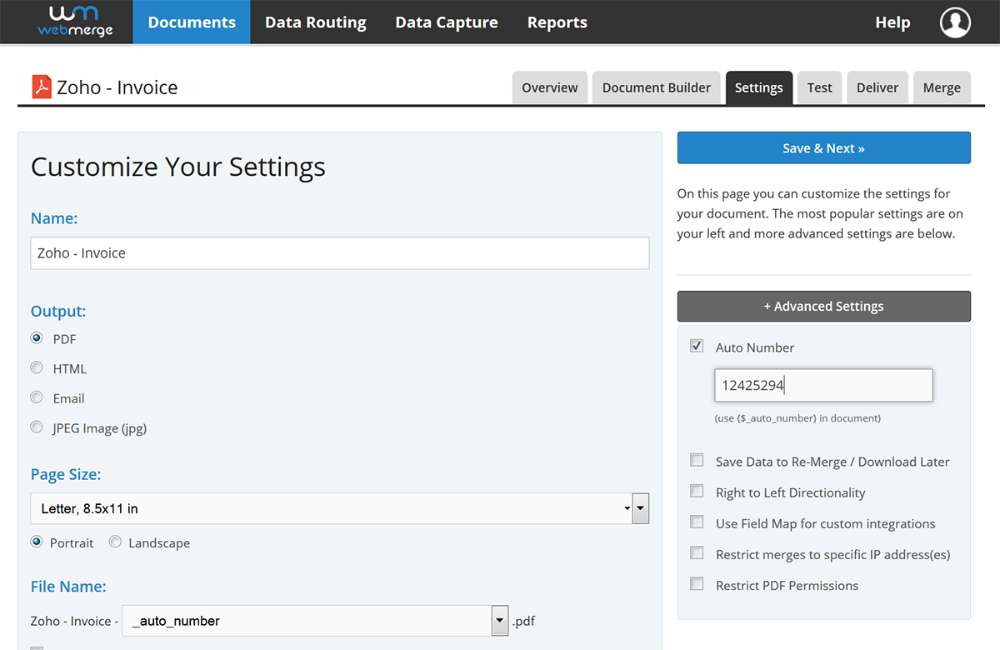
Once we have the invoice finished, we’re going to save it and move on to the Settings tab. From this tab you’re going to be able to change things like the document output (ie the type of document that is generated), then name of the file that is generated and more document level settings.
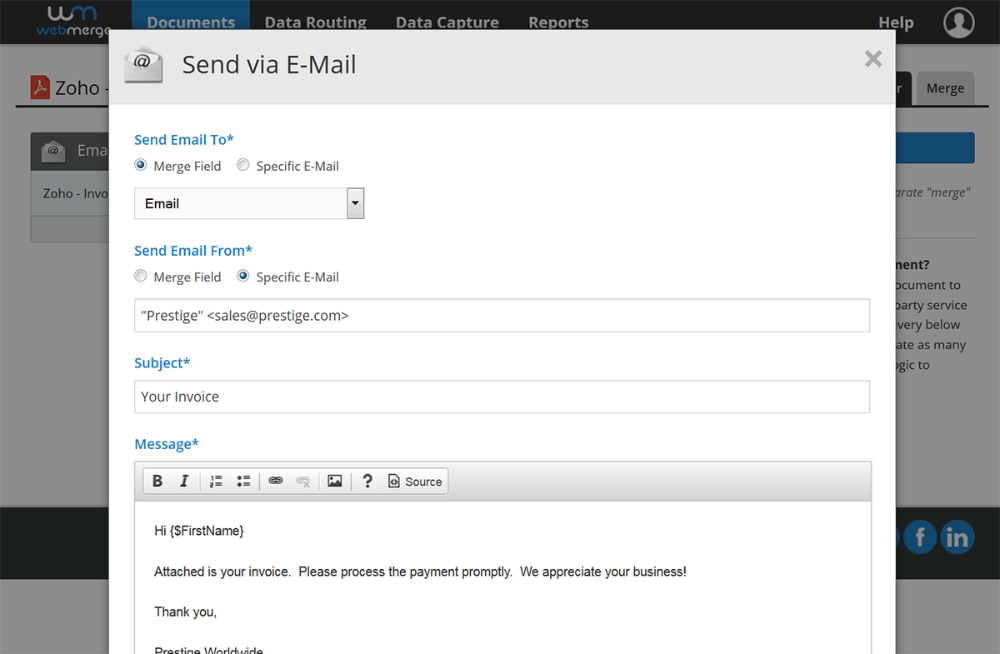
Our next step is going to be setting up the delivery of our invoices. Go ahead and jump to the Deliver tab. We’re just going to email the invoice directly to our customer, so we’re going to edit the default email delivery to go to the merge field for the email address of our customer. You can also edit any of the other settings for the email.
After you’ve saved the email delivery, we’re all finished with the setup of the WebMerge document and we’re ready to integrate Zoho CRM. Before we leave WebMerge, let’s jump over to the Merge tab and grab the Merge URL for our document. This is a unique URL for our document and we’ll use that in the Zoho Webhook setup to send data directly to our document.
Inside Zoho CRM, we’re going to use a Workflow to automatically detect when we update the stage of a potential and then we’ll fire off a webhook when that stage is “Closed Won”.
To setup the Workflow, click the Setup button in the top right of the page, then click the Automation link. This will take you to the Workflow page.
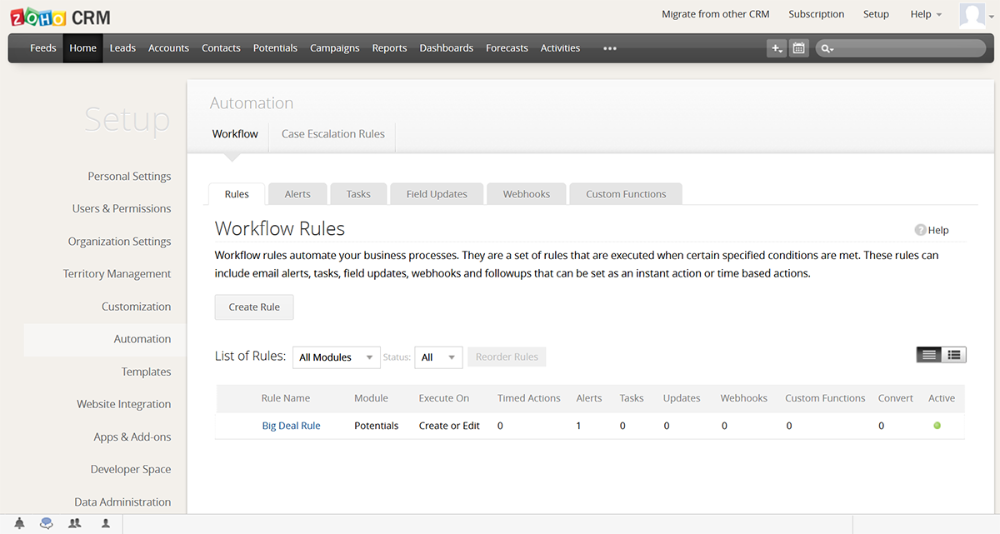
Go ahead and click the Create Rule button so we can setup a new workflow rule to detect when we update the stage of a potential. You’ll be asked to pick the Module (pick Potentials) and then enter a name for the workflow rule.
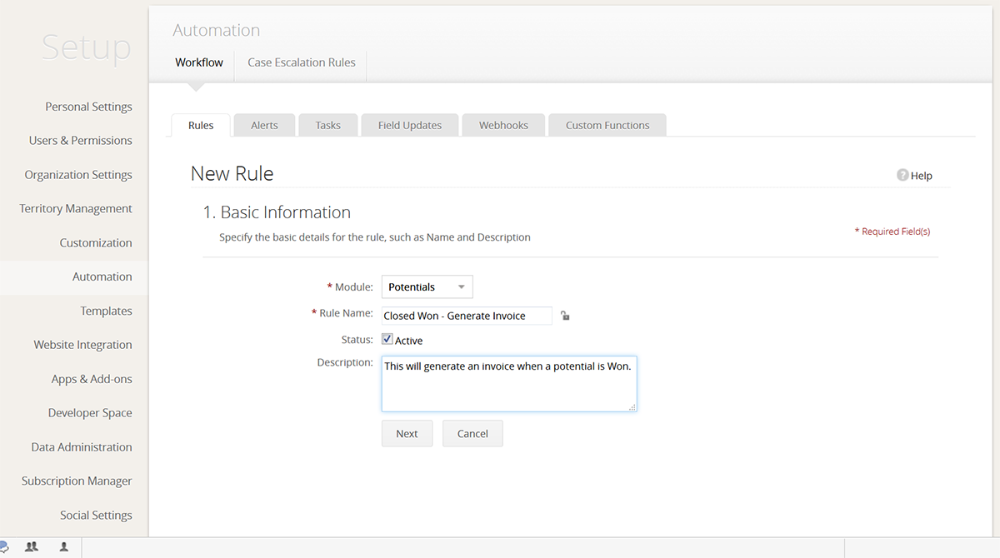
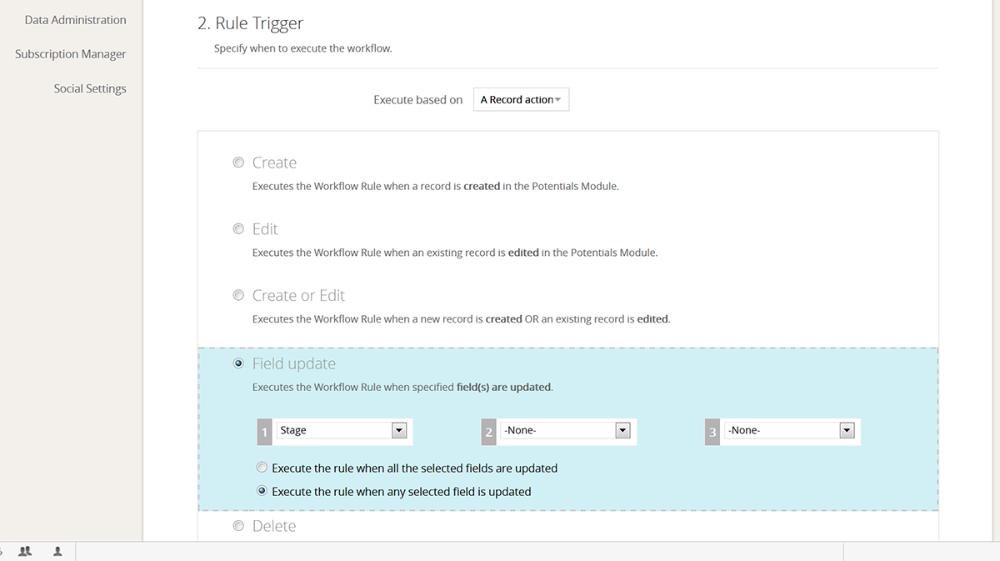
After you’ve entered that information, click the Next button. You’ll see a section where you identify the Rule Trigger. This is where you are going to tell Zoho to look for a potential that is updated to Closed Won.
From the “Execute based on” dropdown, pick the “A record action” option and then you’ll see options for the type of record action. You’ll want to pick the “Field update” option and then pick your Stage field.
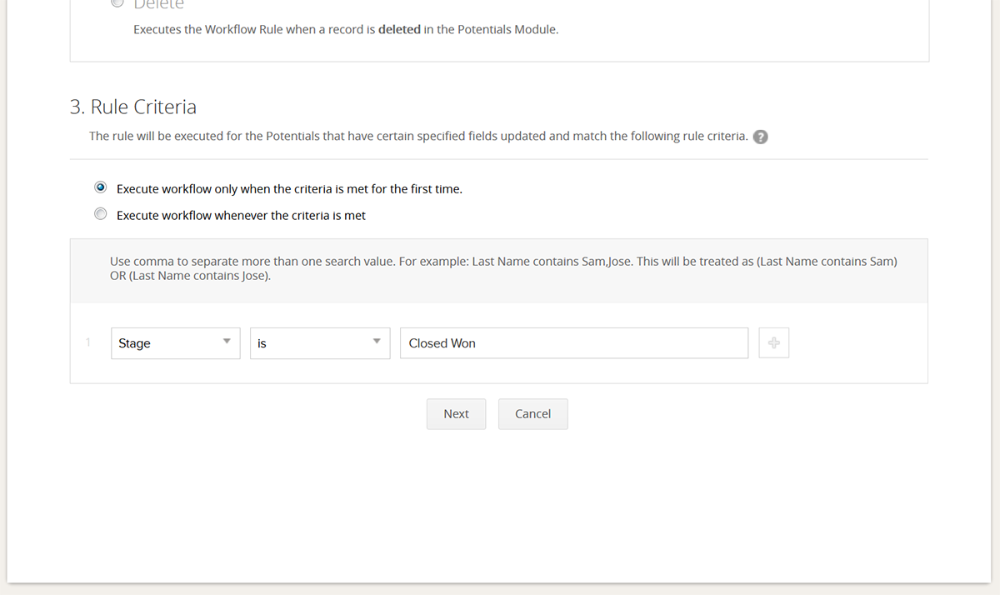
Click Next and you’ll be taken to a section that will allow you to define the criteria / logic for when this trigger should fire. Here’s where we’re going to tell the system to look for Stage being “Closed Won”.
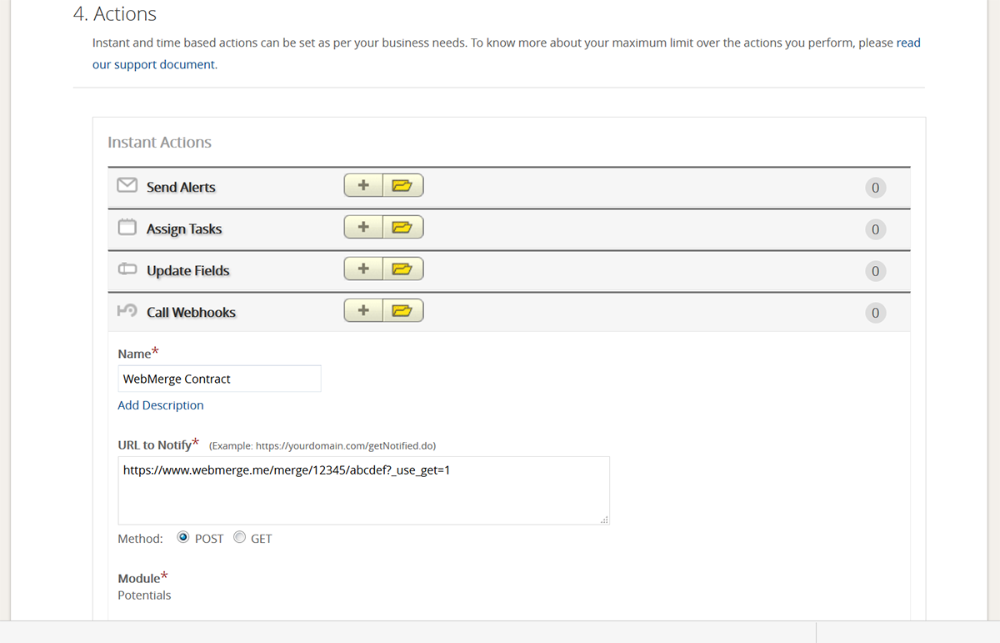
After we setup the criteria, the next step is going to be setting up the webhook action. Under the Actions section, click the + button next to the Webhooks option. For the “URL to Notify” we’re going to put our Merge URL (for our document) in that box, with an extra parameter at the end called “_use_get=1”. In a second, we’re going to define the URL parameters for our fields, and this “_use_get=1” tells WebMerge to look at the URL for the data.
Example: https://www.webmerge.me/merge/12345/abcdef?_use_get=1
Next, we’re going to add the merge fields to the webhook URL Parameters setup. For each merge field, add it in the box on the left then choose the corresponding Zoho field on the right.
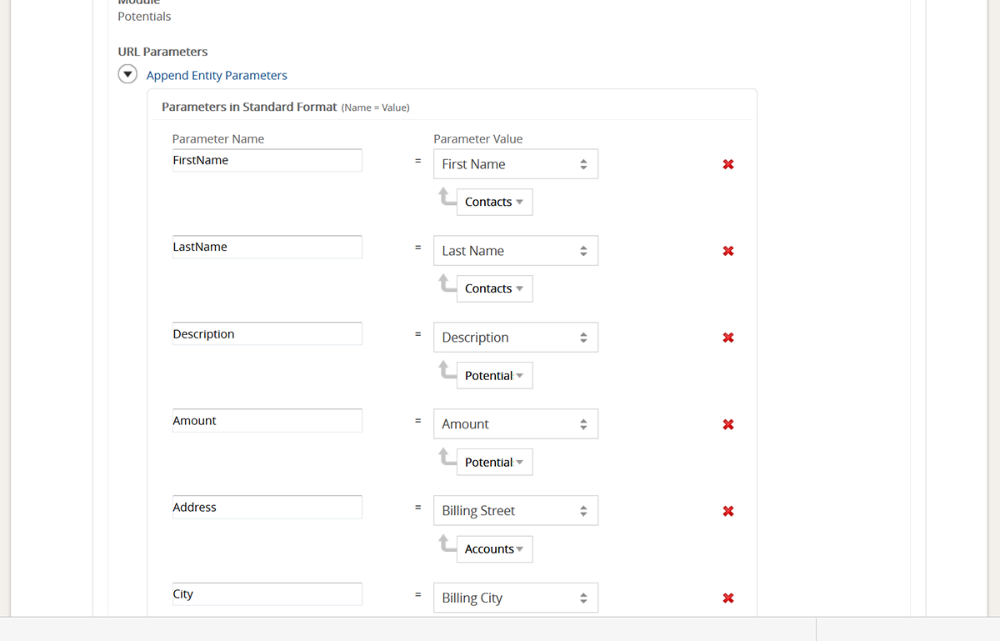
Once you’ve finished adding all the fields, click the Save and Associate button to save the webhook. That finishes the setup of the workflow rule, so go ahead and click the Save button at the bottom.
You’re all done! Now it’s time to run a quick test to make sure everything is working perfectly. Go ahead and open up a test potential and update the Stage to Closed Won. You should then receive an email from WebMerge with your invoice attached!
Here’s what our test looked like:
That’s pretty cool, isn’t it? Now you can automatically generate documents from Zoho without needing to lift a finger. Can you think of other ways you could WebMerge and Zoho to simplify your paperwork process?